Connecting to SQL Azure with SQL Server Management Studio 2008 R2
Goal: Show a user how to connect to a SQL Azure Server from SQL Server Management Studio 2008 R2. If you don't have a SQL Azure account you can treat this post as information to further your knowledge about Microsoft cloud storage
As of 11/10/2009, SQL Server 2008 R2 is feature-complete as well as SQL Azure. The new version (PDC 2009) of SQL Azure has been provisioned on all of the production servers. The current version of SQL Server 2008 R2 available is CTP which is a publicly available beta of the Enterprise Edition (Note: Enterprise Edition is not the highest edition anymore. Since SQL 2008 R2, Microsoft has added Premium Editions that allow for massively-scalable database servers).
What you need to follow along:
- SQL Azure Account (active)
- SQL Server 2008 R2 Management Studio Installed (Download just the Management Studio tools here)
For the initial release being shown at the PDC 2009, SQL Azure includes some new configuration features that need to be enabled in order to connect:
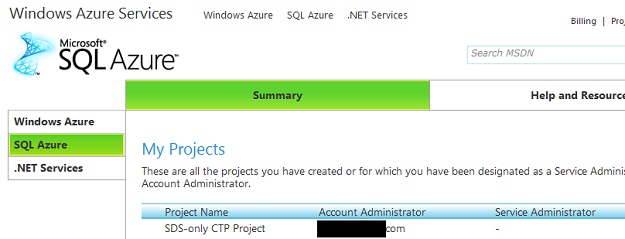
- Log in to http://sql.azure.com with your account information
- Go to the SQL Azure tab to access your projects (If one doesn't exist, create one.)
- Click on the project row to access the SQL Azure Server Administration screen.
- If you do not have a server SQL Azure server provisioned, you will be asked to create one.
- In the SQL Azure Administration Screen you can
- Drop/Re-create a server
- Reset the admin password
- Get a connection string to the database server
- Test the server connection (send a connection ping)
- Manage your databases
- Change the Firewall Settings
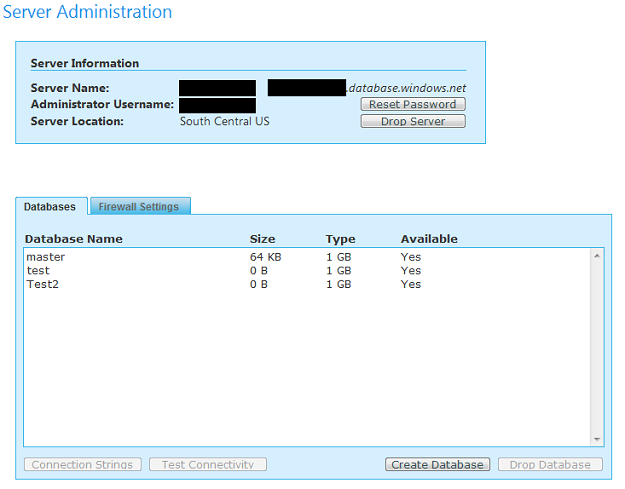
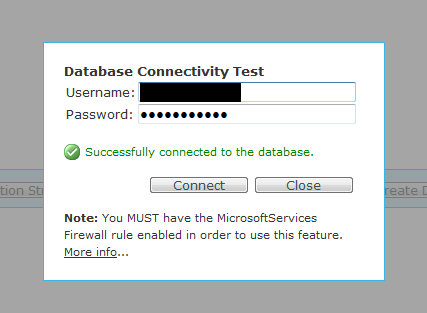
- Create a sample database and click the "Test Connectivity" button to ensure you can connect via the network/firewall to the remote Azure server. This step should be done to make sure that you do not have any network or firewall issues. Furthermore, this ensures that the server and database were properly provisioned in the Azure Cloud and are fully functional.
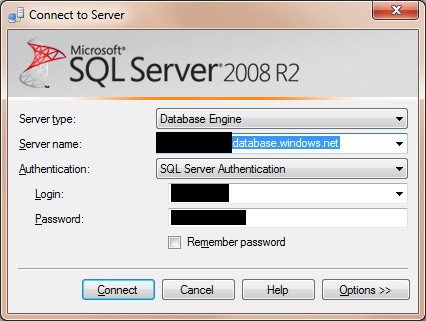
- Open SQL Server 2008 R2 Management Studio and in the Server Name text box, enter the name of the SQL Azure Server from the Server Administration screen (Shown in Step 5). Make sure you copy the fully qualified DNS name (as shown in the screen below). Ensure that the Server Type is set to Database Engine and the Authentication is set to SQL Server Authentication.
- Try connecting by hitting the Connect button. If you get an error similar to the one shown below that states your IP does not have access, you need to configure your SQL Azure Firewall settings.
- SQL Azure (as of the October 2009 version) includes Firewall Settings manager that allows you to explicitly control which IP addresses are allowed to connect to your Azure database server. This was done to alieviate customer concerns regarding placing sensitive data on Microsoft's server. If you specify that only your network can access the database server, this gives you more piece of mind that a hacker hasn't hijacked the user/password and can connect. Furthermore, it is more secure and a best practice to do this.

- In order to fix this, we simply need to allow the IP address you are connecting from in the Firewall Settings manager.
- One question you may be asking is, what do I do if I have a dynamic IP"? For example, if you have a broadband connection such as DSL or FIOS, your IP address can change over time. This would be really annoying if you had to add a firewall exception every other day! One way to get around that is to find your ISP's IP range and enter that in the exception. It is not as secure as providing a single static IP address however. It is much more secure than opening up SQL Azure to the entire Internet (full range of IPs). Most ISPs will provide the range for your area if you call them. Some even publish this information on their knowledgebase/support.
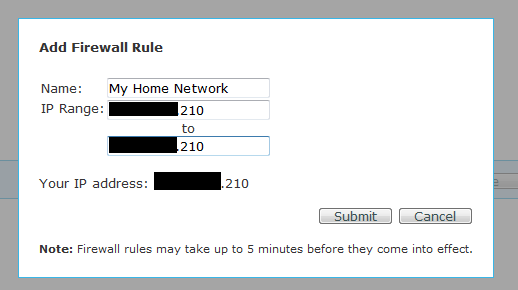
- Go back to the SQL Azure Server Administration screen and click the Firewall tab. Clicking the Add Rule button will bring up a model popup where you can enter the name of the Firewall rule and enter either a range of IPs or a single IP:
- The popup lets you know what your current IP address is. You can simply copy and paste it into both locations. You can enter as many locations as you need. For example, you may have a home network, wireless card with an IP range, work network, etc.
- If you have an ISP that has a dynamic list of IPs, enter the IP range that was provided to you.
- This is NOT recommended, but you could add a rule that opens up the entire IP stack of the Internet by entering 0.0.0.0 -> 255.255.255.255
- If you are not comfortable with an IP range, another solution is to use a "proxy service" and this will masquerade your IP to something else. Static IP addresses cost money; however, they can be useful in these situations.
- The dialog mentions that it could take up to five minutes to connect. I tried this several times and after one minute, you should be able to connect.
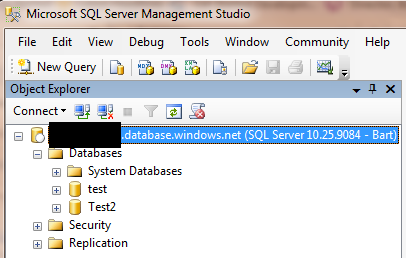
- You should be able to open up SQL Server 2008 R2 Management Studio and connect to your SQL Azure database. If you are successful, you will see your database in the Object Explorer (shown below)
Conclusion
You should now be able to configure an SQL Azure database and connect to it via SQL Server Management Studio. Managing a SQL Azure is a little different and in my next post I will show some of the features of managing SQL Azure with SQL Server 2008 Management Studio.
Silverlight 2 Tools, SQL Server 2008 and Visual Studio 2008 SP1 Installed & Working Together
This article goes over the steps needed to:
- Install SQL Server 2008, Visual Studio 2008 SP1 and Silverlight 2 Beta 2 together
- Install Visual Studio 2008 SP1 & Silverlight 2 Beta 2 together
- Items to remove if you had: SQL Server 2008 Beta/RC or Visual Studio 2008 SP1 Beta installed
Last week Microsoft released SQL Server 2008. SQL Server 2008 includes several tools and services that require .NET 3.5 Service Pack 1. The redistributable is included with the SQL Server 2008 installation. However, this caused problems with workstations that had Visual Studio 2008 installed. Visual Studio 2008 could not work with .NET 3.5 SP1 as it ran on the original .NET 3.5 version. This was the first thing I ran into when I installed SQL Server 2008 last week. This is all detailed in the Microsoft Help & Support section here:
http://support.microsoft.com/kb/956139
The second issue is that even if Visual Studio worked, the Silverlight tools for .NET 3.1 SP1 were not released. So I ended up uninstalling SQL Server 2008 and putting off my upgrade on all my workstations/servers. Today (8/11/2008) Microsoft released several tools in order for developers to install Silverlight, SQL Server 2008 and Visual Studio 2008 SP1 on a single workstation.
Before we get started, this is what you will need in order to compete the installation. Please note these items, as upgrading your workstation to this environment can take some time:
-
Depending on your workstation (processor/network connection), this can take well more than a couple of hours to set up.
-
Plan for 2-5 hours of non-continous time (you click install and browse the internet while it installs)
-
The more beta items you have installed the more complex the process will be
-
SQL Server 2008 has a new installation process. It helps to familiarize yourself with it before going any further
-
Visual Studio 2008 installed or CD (possibly need the CD media, more on that later)
-
Downlad the Visual Studio Patch Removal Tool (ISO file)
-
Download the Visual Studio 2008 Service Pack 1
-
Download the Silverlight 2 Beta 2 Tools for VS 2008 SP1
-
SQL Server 2008 (Download from MSDN, if you have a subscription) (ISO file)
-
Extract the ISO files:
-
Below are three scenarios listed. These should be done in the order noted below; Otherwise, you could run into problems. Specifically, SQL Server 2008 HAS to be installed after Visual Studio 2008 and Visual Studio 2008 SP1 (exception noted below):
On a 100% clean workstation, follow these steps:
- Install Visual Studio 2008
- Install Visual Studio 2008 Service Pack 1
- After the installation, it will prompt you for a reboot. If you are planning to install the Silverlight Tools, ignore the reboot and Install the Silverlight Tools. If not installing the Silverlight Tools, reboot the workstation
- Install Silverlight 2 Beta 2 Tools for VS 2008 SP1
- Reboot (If you do not reboot, you will receive weird errors that say the SP1 or Silverlight Tools are not installed)
- Install SQL Server 2008
On a workstation that has Visual Studio 2008 and NEVER had Silverlight Tools installed, SQL Server 2008 Beta/RC, .NET 3.5 SP1 Beta, follow these steps:
- Install Visual Studio 2008 Service Pack 1
- After the installation, it will prompt you for a reboot. If you are planning to install the Silverlight Tools, ignore the reboot and Install the Silverlight Tools. If not installing the Silverlight Tools, reboot the workstation
- Install Silverlight 2 Beta 2 Tools for VS 2008 SP1
- Reboot (If you do not reboot, you will receive weird errors that say the SP1 or Silverlight Tools are not installed)
- Install SQL Server 2008
On a workstation that has Visual Studio 2008 and you installed any of these items: SQL Server 2008 Beta/RC, VS 2008 SP 1 Beta or Silverlight Beta 2 Tools for VS 2008
- Uninstall SQL Server 2008 Beta/RC0 (if applicable)
- This includes all the components (.NET 3.5 Beta 1, SQL Server 2008 Browser, Support Files, etc.)
- Uninstall Visual Studio 2008 SP1 Beta 1 (DO NOT uninstall Visual Studio 2008)
- Uninstall Silverlight 2 Beta 2 Tools for VS 2008
- Run the Visual Studio Patch Removal Tool
- This tool will remove any VS 2008 SP1 Beta files remaining on the workstation and ensure you can install VS SP1
- This may require you to have your VS 2008 media (CD) handy
- Check out Heath Stewart's blog for more details
-
Install Visual Studio 2008 Service Pack 1
-
After the installation it, will prompt you for a reboot. If you are planning to install the Silverlight Tools, ignore the reboot and Install the Silverlight Tools. If not installing the Silverlight Tools, reboot the workstation
-
Install Silverlight 2 Beta 2 Tools for VS 2008 SP1
-
Reboot (If you do not reboot, you will receive weird errors that say the SP1 or Silverlight Tools are not installed)
- Install SQL Server 2008
You technically do not have to install SQL 2008 last. However, it makes your life much easier if you do. You can do this:
- ...
- Install SQL Sever 2008 (Only install components of SQL Server 2008 that do not require Visual Studio 2008.) Do NOT select the following features:
- Management Tools (Basic or Complete)
- Integration Services
- Business Intelligence Development Studio
- Install VS 2008 SP1
- ....
- Install the missing components for SQL Server 2008 that you omited (SSMS, Intergration Services, BIDS)
This is NOT recommended, but possible. I figured I would post this in case someone else tried that scenario.
- All of your existing VS 2008 projects will open normally. There is no "conversion/upgrade" required
- I tried a couple of big Silverlight 2 Beta 2 projects and they transferred seamlessly
- Note: apparently ADO.NET Data Services in SQL Server 2008 currently do not work with Silverlight 2 Beta 2
- If you have any problems, feel free to post/email them to me
SQL Server 2008 Quick Fact - New SSMS Shortcut
SQL Server 2008 is around the corner and I have been playing with it on and off. Microsoft has renamed the shortcut for starting Management Studio (old Query Analyzer + Enterprise Studio) in 2008. I found this almost a year ago with one of the Release Candidates, but was reminded of it when I re-installed SQL Server 2008 this weekend.
I am a big fan of shortcuts. Every developer sets their machines differently and working with database servers its always faster typing in the shortcut in start->run rather than digging for an icon.
SQL 2000
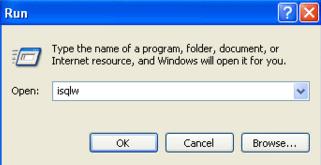
In SQL Server 2000, to launch Query Analyzer we ran the ISQLW shortcut. This essentially was the GUI equivelant of the ISQL console application.
SQL 2005
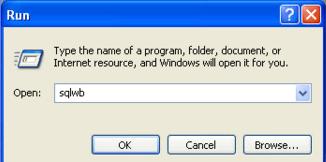
In SQL Server 2005, the Query Analyzer application and Enterprise Manager had their functionality merged into one application called "SQL Server Management Studio". One would figure that the shortcut for SQL Server 2005 would be SSMS or something. The shortcut is actually called SQLWB. For those that have played with some of the private old alphas of SQL Server 2005 (when it was still called Yukon) might remember that Management Studio was actually called SQL Server Workbench. That executable had remained SQLWB even though the product name got changed.
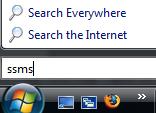
SQL 2008
In SQL Server 2008, FINALLY we have a standard shortcut. The shortcut now is SSMS; you guessed from the product name SQL Server Management Studio. This is not the most prolific feature inside SQL Server 2008, but I thought it is nice that finally the shortcut is standard with the long name of the product. There was someone in Microsoft who was probably asking himself the same thing "Why is the SQL Server Management Studio executable SQLWB?" nad finally decided to change it.